The Honda Pilot’s climate control system keeps everyone comfortable, but figuring out all the buttons and settings can be confusing at first. Once you understand how the dual-zone and tri-zone systems work, you’ll have complete control over your cabin temperature for every passenger.
Your Honda Pilot came equipped with either a dual-zone or tri-zone automatic climate control system, depending on the trim level and year. These systems let different areas of the vehicle maintain separate temperatures, which is perfect when passengers have different comfort preferences.
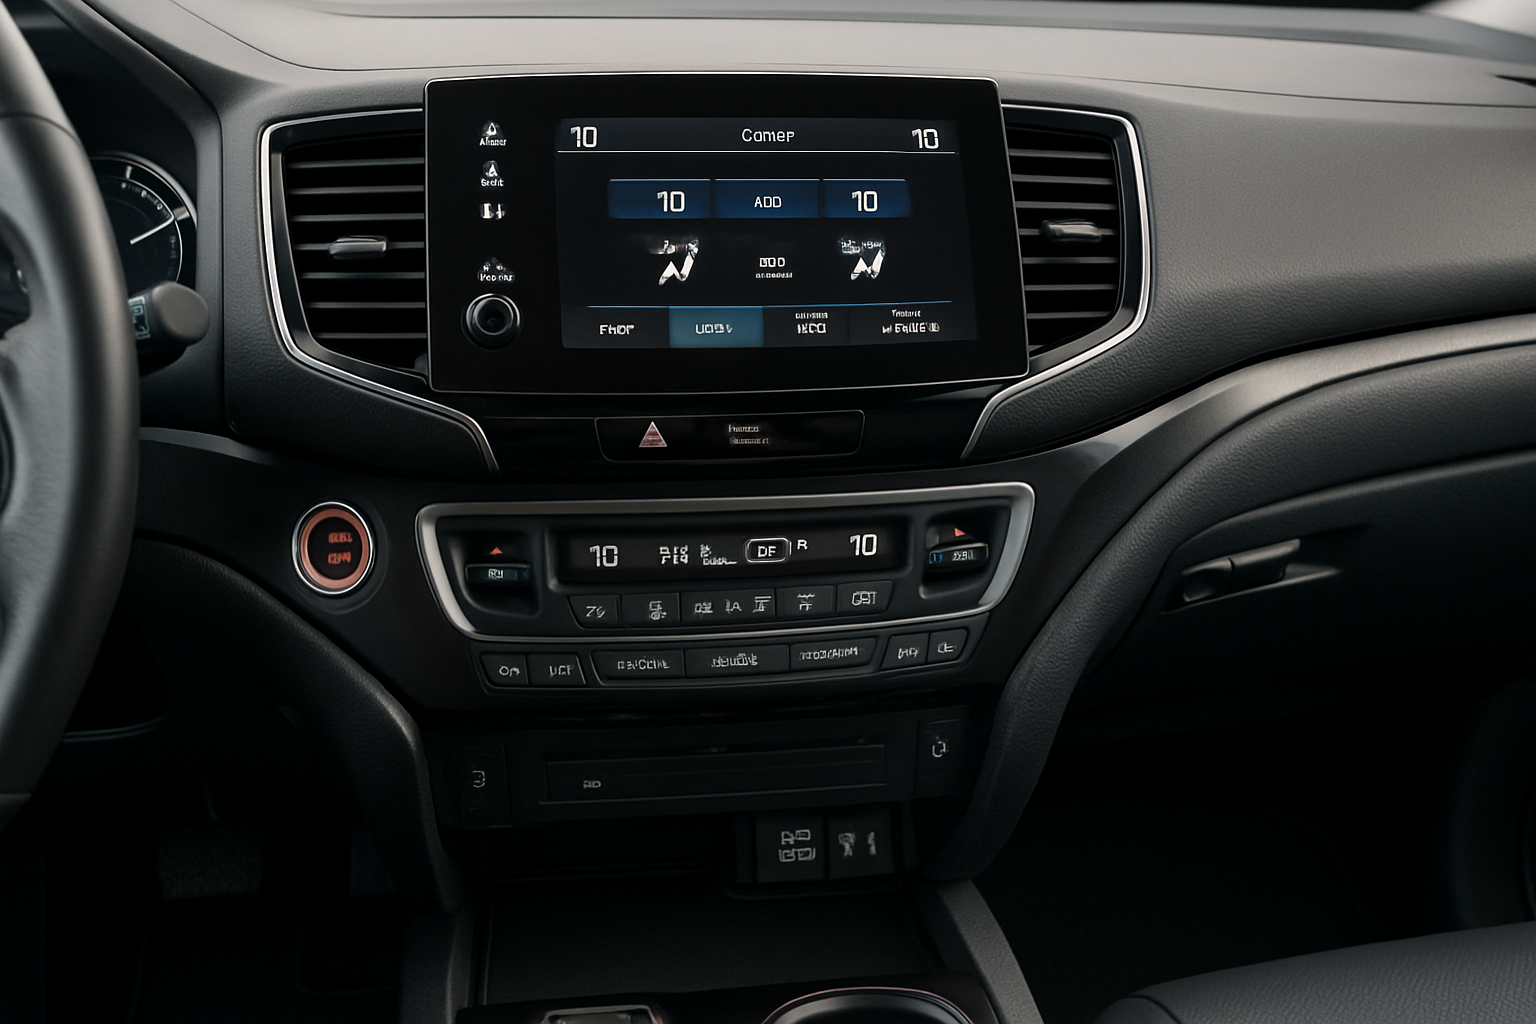
Understanding Your Honda Pilot’s Climate Control System
The dual-zone system controls temperature separately for the driver and front passenger. The tri-zone system adds independent rear climate controls, giving back seat passengers their own temperature settings.
You’ll find the main climate controls in the center dashboard area. Most Honda Pilots from 2016 onward feature a touchscreen interface with physical knobs for temperature adjustment. Earlier models use traditional buttons and displays.
The system includes several key components: temperature control knobs or buttons, fan speed controls, air distribution settings, and mode buttons for automatic operation. Additional controls manage air recirculation, rear window defrost, and synchronization between zones.
Using Dual-Zone Climate Control
The dual-zone system gives you and your front passenger independent temperature control. Each person can set their preferred temperature using separate controls.
Look for two temperature adjustment knobs or digital controls on your dashboard. The left side controls the driver’s temperature, while the right side manages the passenger temperature. You can adjust these independently by turning the knobs or using the touchscreen controls.
When you first start the vehicle, both zones typically default to the same temperature setting. You can immediately adjust either zone to your preference. The system will work to maintain these different temperatures using blend doors that mix heated and cooled air for each zone.
Fan speed affects both zones equally in dual-zone mode. You can’t have different fan speeds for driver and passenger sides, but the air temperature will vary based on your individual settings.
Activating Auto Mode
Press the “AUTO” button to let the system automatically manage fan speed, air distribution, and air conditioning operation. Auto mode works independently for each zone, maintaining your set temperatures with minimal input from you.
In auto mode, the system will increase fan speed and adjust air distribution when it needs to reach your target temperature quickly. Once the cabin reaches the desired temperature, it reduces fan speed and maintains comfort levels.
You can override auto mode settings at any time. If you manually adjust fan speed or air distribution, the auto indicator may turn off, but temperature control remains automatic.
Using the Sync Button
The SYNC button synchronizes both zones to match the driver’s temperature setting. This is useful when you want both sides of the cabin at the same temperature instead of managing two separate zones.
Press SYNC once to match the passenger zone to the driver zone. The passenger temperature display will change to match the driver setting. Both zones will now respond to changes made with the driver temperature control.
To return to dual-zone operation, simply adjust the passenger temperature control. This automatically disables sync mode and allows independent temperature control again.
Operating Tri-Zone Climate Control
Tri-zone systems add rear climate controls to the dual-zone setup. Your rear passengers get their own temperature adjustment and fan speed controls, usually located in the center console or overhead console area.
The rear zone operates independently from the front zones. Rear passengers can set their own temperature and fan speed preferences using dedicated controls. These controls are typically simpler than the front system, with basic temperature and fan adjustments.
Look for rear climate control buttons near the second-row seating area. Common locations include the back of the center console, between the front seats, or in an overhead console. The controls usually feature up and down arrows for temperature adjustment and fan speed buttons.
Rear Zone Operation
Rear passengers can adjust their zone temperature and fan speed independently of the front zones. The rear system draws air from the main HVAC unit but delivers it through separate vents with independent temperature control.
When rear passengers adjust their controls, they only affect the rear zone. Front zone settings remain unchanged. The rear zone can operate even when front passengers have different temperature preferences.
Some Honda Pilot models include rear zone controls that can be turned completely off. This sends all airflow to the front zones and may improve heating or cooling performance for front passengers when the rear seats are empty.
Air Recirculation vs Fresh Air Mode
The recirculation button controls whether your climate system draws air from outside the vehicle or recirculates cabin air. Understanding when to use each mode improves comfort and efficiency.
Fresh air mode brings outside air into the cabin through the climate system. This mode works well in moderate weather and helps prevent window fogging by introducing drier outside air. The button will show an arrow coming into the vehicle symbol.
Recirculation mode closes the outside air intake and circulates existing cabin air. This mode helps the air conditioning cool faster in hot weather and prevents outside odors or pollutants from entering the cabin. The recirculation symbol shows air circulating within the vehicle outline.
Use recirculation when driving through areas with strong odors, heavy traffic, or construction dust. Switch to fresh air mode for normal driving, especially in humid conditions where window fogging might occur.
Automatic Air Management
When you select auto mode, the climate system automatically switches between fresh air and recirculation based on outside conditions and cabin temperature needs. The system typically uses recirculation during initial cooling or heating, then switches to fresh air for maintenance.
You can manually override the automatic air management by pressing the recirculation button. The system will maintain your selection until you press the button again or restart the vehicle.
Cold weather operation often requires fresh air mode to prevent excessive humidity buildup inside the cabin. The system may automatically disable recirculation in defrost modes to ensure proper window clearing.
Managing Air Distribution Settings
Air distribution controls direct airflow to different areas of the cabin. Your Honda Pilot offers several distribution patterns for optimal comfort in various conditions.
Panel mode directs air through the dashboard vents toward passengers’ upper bodies. This mode works well for cooling in warm weather when combined with air conditioning.
Bi-level mode splits airflow between panel vents and floor vents. This provides good overall cabin comfort by cooling upper areas while providing warmth or airflow to passengers’ feet.
Floor mode directs most airflow to floor vents. This setting works well for heating in cold weather, as warm air naturally rises from the floor level.
Defrost modes direct airflow to windshield and window vents to clear fogging or ice. The system automatically switches to fresh air mode and may engage the air conditioning compressor to dry the air, even in cold weather.
Cabin Air Filter Maintenance
Your Honda Pilot’s climate control system depends on a clean cabin air filter for proper operation. The filter removes dust, pollen, and other particles from incoming air before it reaches the passenger compartment.
A dirty cabin air filter reduces airflow from your vents and can cause unpleasant odors. You’ll notice reduced fan performance and potentially musty smells when the filter needs replacement.
Most Honda Pilots require cabin air filter replacement every 15,000 to 30,000 miles, depending on driving conditions. City driving, dusty conditions, and areas with high pollen counts may require more frequent replacement.
The cabin air filter is typically located behind the glove compartment. You can replace it yourself by removing the glove compartment and accessing the filter housing. Honda part number varies by model year, so check your owner’s manual for the correct specification.
Filter Replacement Reminders
Some Honda Pilot models include maintenance reminders on the information display. The system may show a cabin air filter replacement reminder based on mileage intervals.
You can reset filter replacement reminders through the vehicle settings menu after installing a new filter. This ensures accurate tracking for the next replacement interval.
Even without electronic reminders, keep track of your filter replacement schedule. Mark the replacement date and mileage in your maintenance records to ensure optimal climate system performance.
Troubleshooting Common Climate Control Issues
Climate control problems often have simple solutions. Understanding common issues helps you identify when you can fix the problem yourself or when you need professional service.
Weak airflow typically indicates a dirty cabin air filter or blocked vents. Check that all vents are open and clear of obstructions. Replace the cabin air filter if it’s been more than 20,000 miles since the last replacement.
Temperature control problems in one zone may indicate a faulty blend door actuator. This requires professional diagnosis and repair, as the actuators are located inside the dashboard.
Unusual noises from the climate system could indicate debris in the blower motor or worn components. Turn off the system and check for obvious obstructions before seeking professional help.
System Reset Procedures
Some climate control issues resolve with a system reset. Try turning the ignition off for several minutes, then restart the vehicle and test the climate controls.
For persistent problems with automatic operation, try switching to manual mode temporarily. Manually control fan speed and temperature to determine if the issue affects automatic or manual operation.
If touchscreen climate controls become unresponsive, the infotainment system may need a reset. Check your owner’s manual for specific reset procedures for your model year.
Maximizing Climate Control Efficiency
Proper technique helps your climate system work more efficiently and reach comfortable temperatures faster. These tips also reduce fuel consumption and system wear.
In hot weather, briefly ventilate the cabin before starting the air conditioning. Open windows or doors for 30 seconds to release the hottest air, then close up and start the climate system.
Use recirculation mode during initial cooling to help the system reach your target temperature faster. Switch to fresh air mode once the cabin becomes comfortable to maintain air quality.
Park in shade when possible to reduce cabin heat buildup. Use sunshades or window tinting to minimize solar heat gain through the glass.
In cold weather, allow the engine to warm slightly before expecting heated air from the vents. The heating system uses engine coolant, which needs time to reach operating temperature.
Frequently Asked Questions
Can I disable one zone in dual-zone mode?
You can’t completely disable a zone, but you can set both zones to the same temperature using the SYNC button. This essentially makes the system operate like a single-zone setup while maintaining the ability to adjust each zone independently later.
Why does my rear zone take longer to cool than the front?
Rear zones receive air that travels through longer ductwork from the main HVAC unit. This creates some delay in temperature changes. Additionally, rear zones typically have less powerful airflow than front zones, so temperature changes happen more gradually.
Should I use AUTO mode or control settings manually?
AUTO mode provides the best balance of comfort and efficiency for most driving conditions. The system adjusts fan speed and air distribution automatically to maintain your set temperature. Use manual controls when you prefer specific fan speeds or air distribution patterns that differ from the automatic settings.
How do I know when my cabin air filter needs replacement?
Reduced airflow from vents, musty odors, and excessive window fogging indicate a dirty cabin air filter. Follow your maintenance schedule for regular replacement, typically every 15,000 to 30,000 miles. Dusty driving conditions may require more frequent replacement.
This article contains affiliate links. If you purchase through these links, we may earn a small commission at no extra cost to you.


Leave a Reply