
Setting the clock in your Toyota Avalon is required after every battery change, and for some models, if you travel to a different time zone. Below, you will find the uncomplicated steps to follow to set the time on the clock.
2023 Models
- Press the Info button.
- Select Adjust Clock.
- Press Enter.
- Select Time Zone.
- Press Enter.
- Enter the Time Zone of your choice, then select Enter and OK.
- Select ON or OFF to set up Auto Adjust.
- Select ON or OFF for Daylight Savings.
- Press Enter.
2019 – 2022 Model
- Select Menu.
- Select Setup.
- Select Clock.
- To utilize GPS, set the Time Zone to Automatic for the time to update automatically.
To Set Up Automatic Time Change:

*AFTER manually entering the time via the H and the M buttons:
- Press the INFO button. (The Menu will be displayed on the navigation screen).
- Touch ADJUST CLOCK and touch ENTER.
- Touch TIME ZONE then touch ENTER.
- Touch the ZONE of your choice, then touch ENTER and OK.
- Touch ON or OFF to set up AUTO ADJUST.
- Touch ON or OFF for DAYLIGHT SAVINGS.
- Then press ENTER.
**You are all SET! The correct time will now appear on your Home Screen automatically.
2005 – 2018 Model
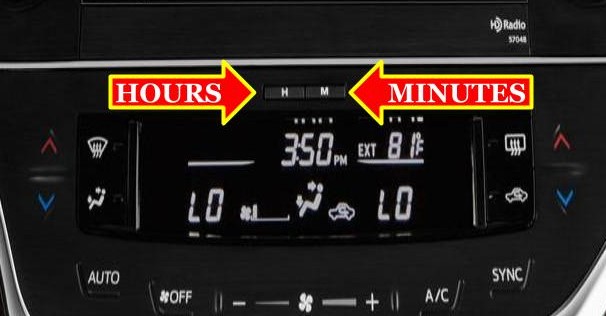
- Press the H button to change the Hour.
- To change the Minutes, press the M button.
Note: Use the 00 buttons to make rapid adjustments.
2003 – 2004 Model
- Hold the Clock button on the dashboard until the display changes to the time setting mode.
- Use the up and down arrows to select the correct hour.
- Press and hold the Clock button to move to the minutes setting.
- Use the up and down arrows to select the correct minutes.
- Press and hold the Clock button again to confirm the time setting.
- Use the left and right arrows to select the 12 or 24-hour format.
- Press and hold the Clock button again to confirm the selection.
2000 – 2002 Model
- Press and hold the Clock button on the radio until the time setting mode appears.
- Use the Tune/Track knob to adjust the hours and minutes.
- Once you have set the time, press the Clock button to confirm the setting.
- Use the Seek button to select the 12-hour or 24-hour clock format.
- Press the Clock button again to confirm and exit the time setting mode.
1995 – 1999 Model
- Turn on the ignition.
- Press the Menu button and use the arrow keys to navigate to the Time option.
- Use the arrows to select the hour, minute, and AM/PM format settings.
- Press the Set button to save the changes.
TIP: For vehicles with digital navigation screens: Turning on the GPS TIME will allow the system to automatically adjust your time dependent on your present location. This feature will change your clock when you cross into a different time zone.
**NOTE: If you are unable to set the Time on the first try, REPEAT the steps. If you are still unsuccessful, contact the dealership for assistance or consult your vehicle user’s manual.

Leave a Reply