Set your Compass Variance Zone
Need to set the compass variance zone in your Chevy Impala? We’ll walk you through the step-by-step-process for each model year.
2014 – 2023 Models
In these models, the compass variance zone automatically adjusts through GPS.
2013 Model
- Press the CAR INFO button until the check mark to CHANGE COMPASS ZONE appears.
- Find your current location on the displayed map.
- Press the check mark to select your location.
- Press ROAD ICON until the vehicle heading is displayed.
2006 – 2012 Models
- Put your Impala in park!
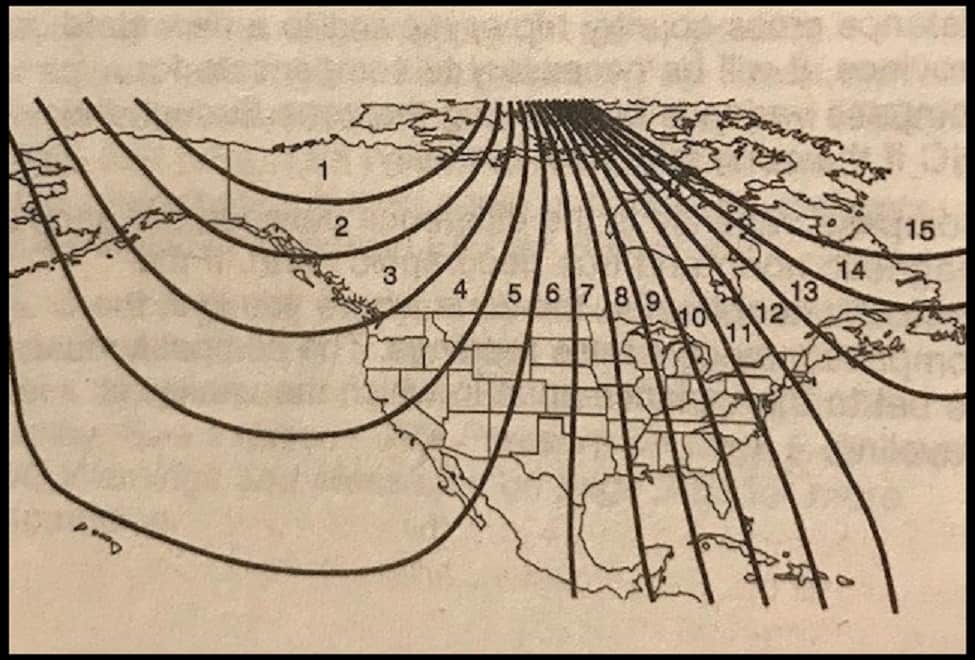
- Check the map above to find your zone.
- To the right of the steering wheel, you’ll find four buttons used to interact with the dash display (aka the driver information center). Choose the second button down with an “i” preceded by a car icon. Let’s call it the Information button.
- Keep clicking Information until you see “PRESS ✔ TO CHANGE COMPASS ZONE“.
- Press the Checkmark button until your zone is displayed
- Press the Road button (which looks like a road and mountains) to return to normal display, or get ready to Calibrate your Compass.
2000 – 2005 Models
- Turn the ignition ON.
- Cycle the DIC to COMPASS/TEMPERATURE MODE.
- Press RESET for 5 seconds.
- Press MODE to show the VARIANCE NUMBER for your location.
- Press RESET.


Leave a Reply