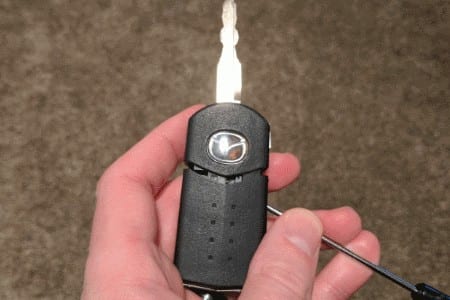
If your key fob isn’t working, it might be time to replace the batteries. But getting inside the remote flip key for certain Mazda models to replace the battery can be tricky. Here’s how it’s done.
Replacing the Battery in the Mazda Key Remote
The battery used in the Mazda remote shown in the photos below utilizes the CR1620 lithium battery. The CR2025 type lithium battery is used in the newer and different-looking key fobs.
2008-2013 Mazda 3, 5, 6, 7, and 2009-2013 Mazda CX-7, CX-9, and RX-8
- Press the button to release the key, then locate the slot inside where the key is housed.

- Use a small flat-head screwdriver to press into the slot. The key remote should separate into two pieces.


- Place the half that contains the metal key to the side. Use a small flat-head screwdriver to pry apart the remote half of the key at the location shown below.


- Now you can pry the battery out of the battery compartment and replace it.

- Remove the battery cap.
- Gently remove the battery to avoid damage to the rubber ring underneath the battery.
- Put your new battery in with the positive (+) side facing up.
- Replace the battery cover and reattach the fob case.
- Press down. When you hear the two pieces click, you’ll know it’s secure.
Once the battery is replaced, reverse these steps to put the key fob back together, and you’re set.
Was this helpful?
Thanks for your feedback!


Thanks! I couldn’t figure this out for the life of me. Every other keyfob for any other vehicle just has a simple screw. Why did this make this so convoluted?
Wow. How ridiculous that you have to pry it open like that. I expected the battery to be behind the screw. thanks for this post.
Thanks so much! I’m pretty handy but couldn’t figure this one out. I found that in step 4, it worked better to pry at the top indentation rather than where the yellow arrow indicates. Thanks again!
I’m with you much easier prying at the top