Backup cameras have been mandatory on new cars since 2018, but millions of older vehicles on the road don’t have one. Adding a retrofit backup camera is one of the most impactful safety upgrades you can make to an older car. It eliminates the blind spot directly behind your vehicle that mirrors can’t cover, making parking lots, driveways, and tight spaces much safer.
Whether you’re maintaining an older daily driver or helping a new driver stay safe, a backup camera provides visibility that wasn’t available when your car rolled off the assembly line.
Wireless vs. Wired Systems
Wireless Backup Cameras
Wireless systems are the easiest to install. The camera mounts above your license plate and transmits a signal to a small monitor on your dashboard. There’s no need to run cables through the car’s interior, which means installation takes 30-60 minutes for most people.
The tradeoff is that wireless signals can experience interference or slight lag. Modern digital wireless systems have largely solved these issues, but very cheap analog wireless cameras may still have fuzzy images or delays. A quality wireless backup camera kit with a digital signal provides clear, real-time video.

Digital Wireless Backup Camera Kit
Look for 5.8GHz digital transmission for minimal interference and clear picture quality
Wired Backup Cameras
Wired systems connect the camera to the monitor via a video cable routed through the car’s trim panels. The picture is consistently clear with zero lag. Installation takes longer (1-3 hours) because you need to route the cable from the rear to the front of the vehicle.
If you’re comfortable removing interior trim panels and routing wires, a wired system gives you the most reliable picture quality. Many wired kits include a rearview mirror with a built-in display, which keeps your dashboard clean.
Display Options
Dashboard Monitor
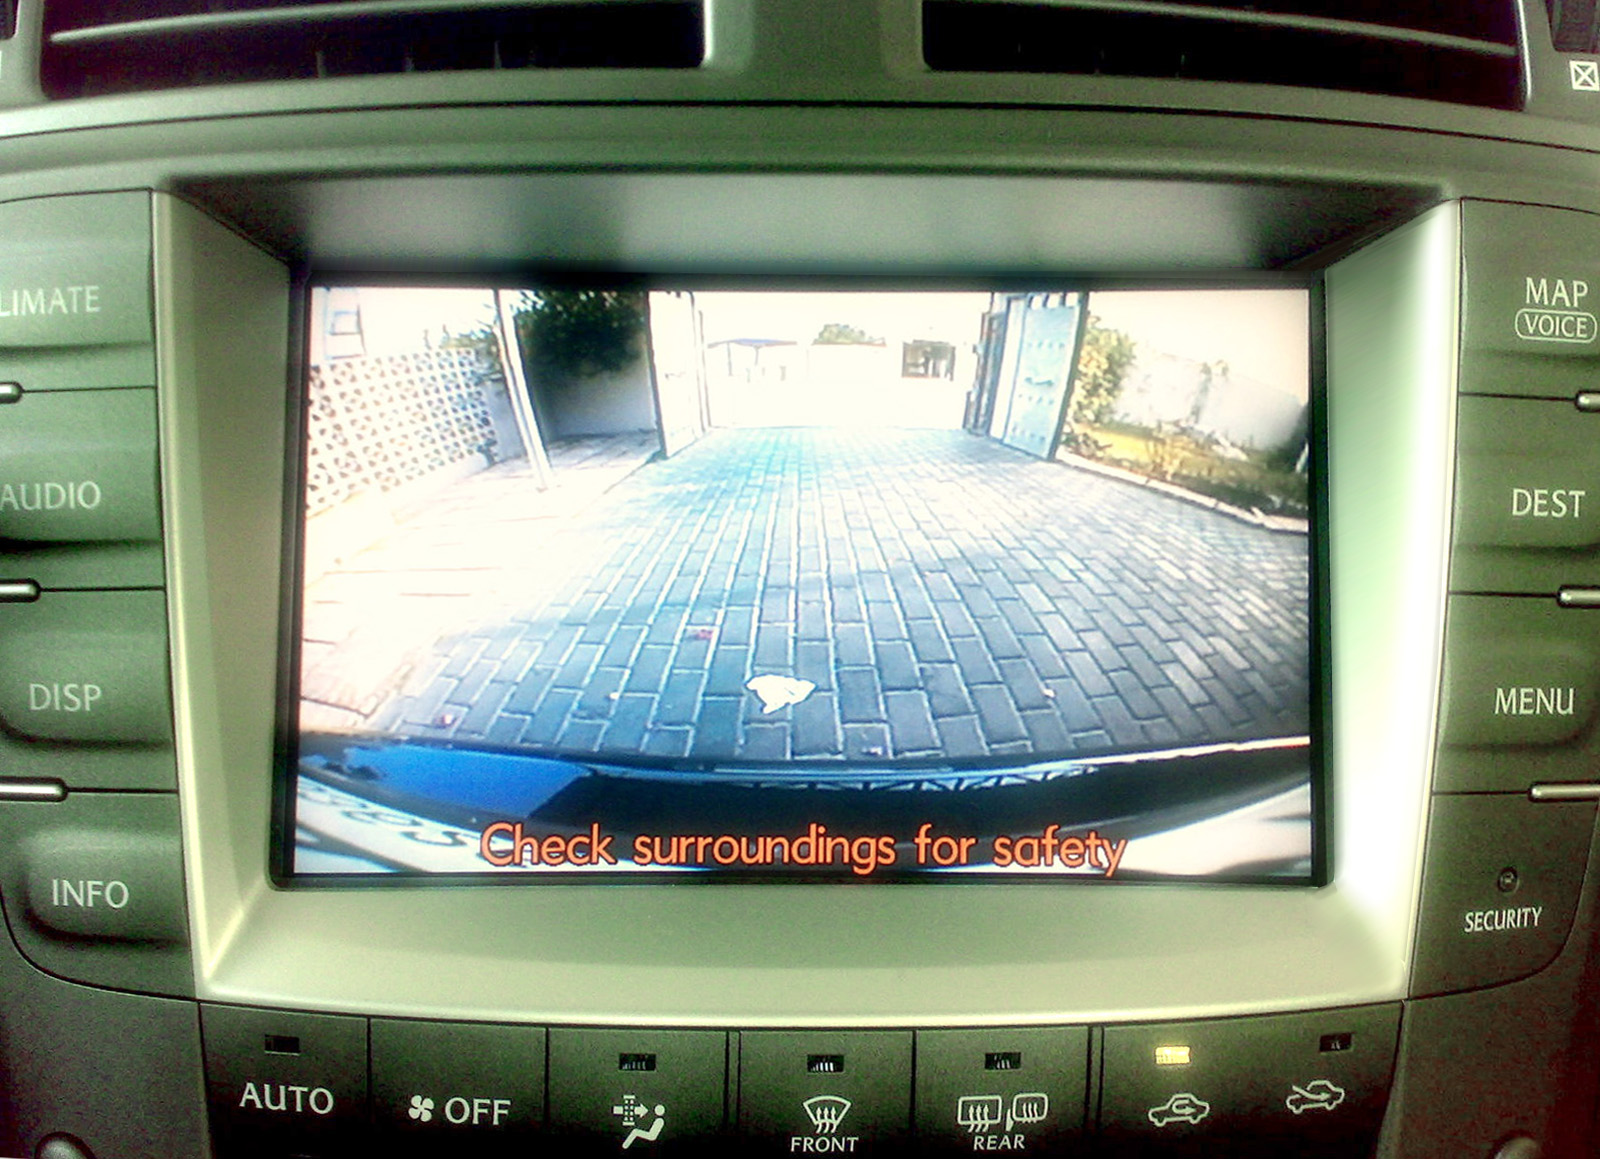
Standalone monitors mount on the dashboard with a suction cup or adhesive. Screens range from 3.5 to 7 inches. A 5-inch screen is the sweet spot for visibility without cluttering the dash. Most activate automatically when you shift into reverse.
Rearview Mirror Display
Mirror-integrated displays clip over your existing rearview mirror. The screen is hidden when inactive, showing a normal mirror reflection. When you shift into reverse, the camera feed appears on the mirror. This is the cleanest-looking option for older cars.

Rearview Mirror Backup Camera Kit
Best option for a factory-installed appearance without modifying your dashboard
Phone App Display
Some cameras connect via Wi-Fi to your smartphone and display the feed in an app. This eliminates the need for a separate monitor but requires mounting your phone where you can see it while reversing. It’s a workable solution but less convenient than a dedicated display.
Camera Features to Consider
Night vision (infrared LEDs) is essential for backing up in dark parking lots and garages. A wide-angle lens (150-170 degrees) covers more area behind the vehicle. Adjustable guide lines overlay on the video to help you judge distances. Waterproof ratings (IP67 or higher) ensure the camera survives rain, snow, and car washes.
Look for cameras with glass lenses rather than plastic. They resist yellowing and fogging better over time, especially if your vehicle sits outdoors.
Installation Tips
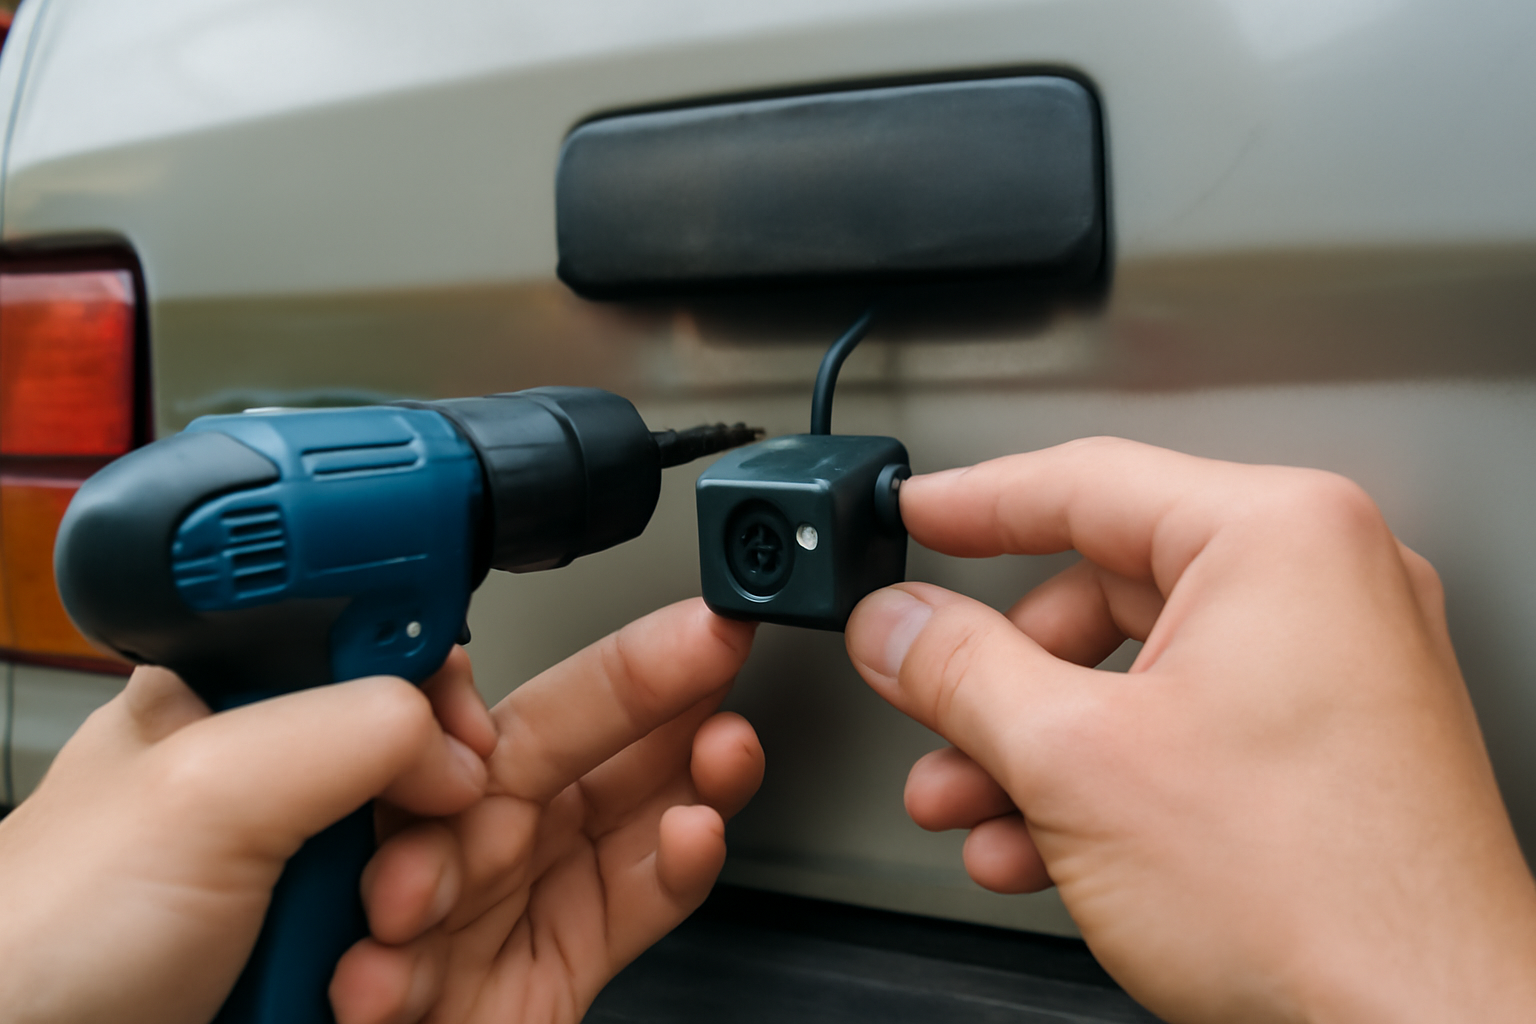
Mount the camera centered above the license plate for the widest, most symmetrical view. Use the mounting bracket that comes with the kit, or replace one license plate light with a camera-integrated light unit for a factory look.
Power the camera from the reverse light circuit so it only activates when you’re in reverse. This is a simple two-wire connection and prevents the camera from draining power while parked. You’ll tap into the positive wire of your reverse light and connect the camera’s ground to a nearby bolt or grounding point.
For wireless systems, position the monitor where you can see it clearly without blocking your view of the road. The passenger side of the dashboard or the top center works well for most vehicles.
For wired systems, route the cable along existing wiring harnesses under the car or through the interior trim panels. Remove the door sill plates and side trim panels to hide the cable completely. This takes more time but results in a professional-looking installation.
Frequently Asked Questions
Can I install a backup camera myself?
A wireless system is a DIY project for anyone comfortable with basic hand tools. Wired systems require more patience for cable routing but don’t need advanced skills. If you’re not comfortable with wiring, a car audio shop can install either type in an hour or two.
Will a backup camera work with my existing head unit?
If your car’s stereo has a video input (many aftermarket units do), you can connect a wired camera directly to it. Factory stereos in older cars typically don’t have video inputs, so you’ll need a separate monitor or a mirror display.
How long do retrofit backup cameras last?
Quality cameras last 3-5 years or more. The camera lens can fog or yellow over time from UV exposure, and the image gradually degrades. Waterproof-rated cameras with glass lenses last longer than plastic-lens models.
Do I need professional installation for a backup camera?
Wireless systems are designed for DIY installation and usually come with everything you need. Wired systems take more work but are still manageable for most car owners. Watch a few installation videos specific to your vehicle model before starting. Professional installation typically runs one to two hours of shop labor if you prefer to have it done.
This article contains affiliate links. We may earn a small commission at no extra cost to you.


Leave a Reply