
Setting the clock in your Honda Odyssey is required after every battery change, and for some models, if you travel to a different time zone. Using the image which suits your vehicle below, you will find the uncomplicated steps to follow to set the time on the clock.
**NOTE: If you are unable to set the Time on the first try, REPEAT the steps. If you are still unsuccessful, contact the dealership for assistance or consult your vehicle user’s manual.
Models Without Navigation Screen
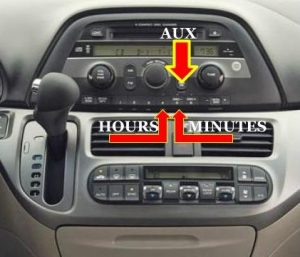
- With your vehicle in the ON position without starting the engine.
- Press and HOLD the AUX/XM button until the time starts to Flash.
- Press the number FOUR button with the H to input the HOURS.
- Press the number FIVE button with the M to input the MINUTES.
- Press the AUX/XM button to finalize the time you entered.
Models With Navigation Screen
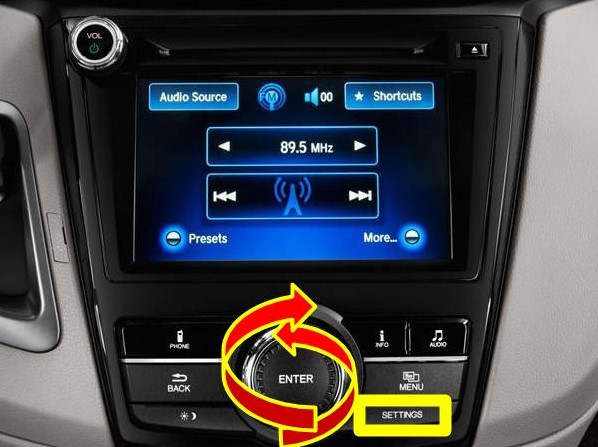
- With your vehicle in the ON position without starting the engine.
- Press SETTINGS.
- Via the screen, you will see lots of options under Settings. Turn the ENTER button to highlight CLOCK ADJUSTMENT.
- Press IN the ENTER button.
- The time will appear on the screen. Turn the ENTER button to input the HOUR then press the ENTER button again.
- Turn the ENTER button to input the MINUTES.
- One last time, press the ENTER button to finalize the time you have entered.
TIP: For vehicles with digital navigation screens: Turning on the GPS TIME will allow the system to automatically adjust your time dependent on your present location. This feature will change your clock when you cross into a different time zone.

Leave a Reply