Nothing is more frustrating than turning on your rear window defroster on a foggy morning only to find it doesn’t work. Your back window stays cloudy while you’re late for work, squinting through a small clear spot you wiped with your sleeve. The good news is that most rear defroster problems are surprisingly easy and cheap to fix yourself.
Why Rear Window Defrosters Stop Working
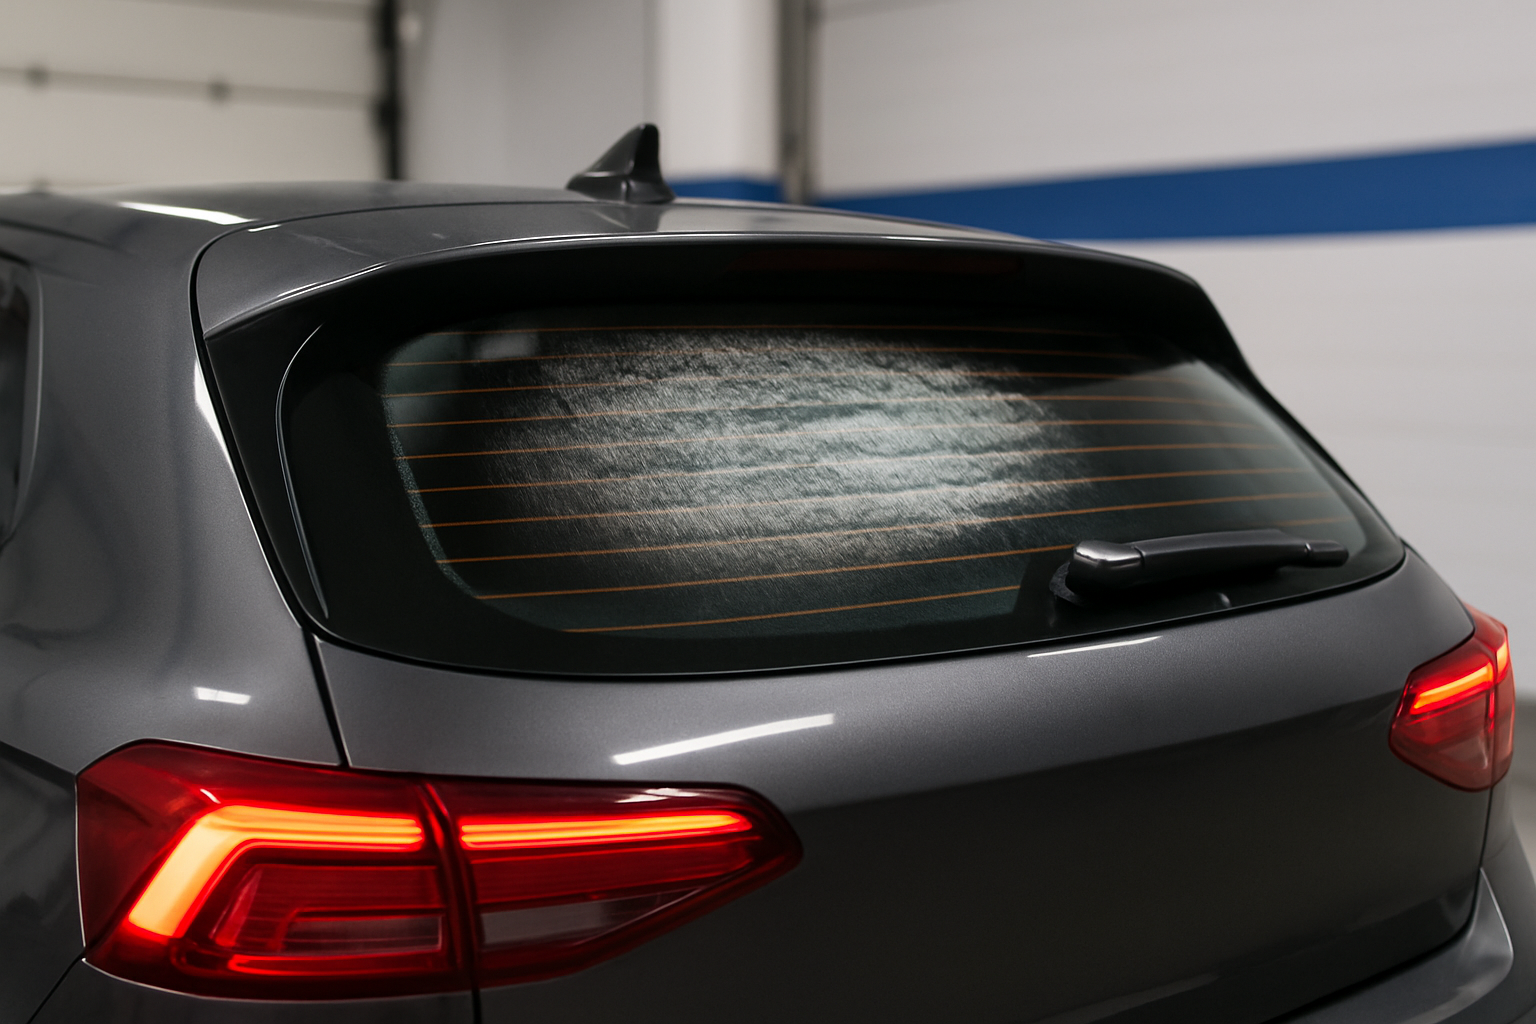
Your rear window defroster works through a series of thin electrical lines baked into the glass. These grid lines heat up when you press the defroster button, melting frost and evaporating condensation. When the system stops working, it’s usually because one or more of these grid lines has been damaged.
The most common culprit is a broken grid line. These delicate conductors can be scratched by ice scrapers, damaged by stickers or decals, or simply wear out over time. Sometimes the problem is electrical, like a blown fuse or faulty timer relay, but physical damage to the grid is what you’ll encounter most often.
Before you panic about expensive repairs, understand that shops often charge $150-200 for defroster repairs that you can handle for under $10 with the right approach.
Diagnosing the Problem
Start with the simplest checks first. Turn on your rear defroster and listen for the fan or feel for warm air. If you don’t hear anything and your dash light doesn’t come on, you likely have an electrical issue rather than damaged grid lines.
Check your owner’s manual for the defroster fuse location. Most vehicles have the rear defroster fuse in the interior fuse box, often labeled as “REAR DEF” or similar. Pull the fuse and inspect it visually. A blown fuse will have a broken metal strip inside the clear plastic housing.
If the fuse looks good and your defroster button lights up when pressed, the problem is probably broken grid lines. You can test this by turning on the defroster and gently touching different sections of the grid lines on your rear window. Working sections will feel noticeably warm after a minute or two.
Visual Inspection of Grid Lines
Look closely at your rear window’s grid pattern. Broken lines often appear as obvious gaps or scratches that cut completely across a horizontal line. Sometimes the damage is subtle, like a hairline crack that’s hard to spot.
Pay special attention to areas where you might have scraped ice or removed stickers. These are the most common failure points. Even tiny breaks can prevent an entire grid line from heating up.
The Simple Electrical Fixes
If your defroster isn’t turning on at all, start with these quick electrical checks that cost practically nothing to fix.
Fuse Replacement
Rear defroster fuses typically range from 15 to 30 amps, depending on your vehicle. You can buy a pack of replacement fuses at any auto parts store for under $5. Make sure you get the correct amperage, which should be printed on the old fuse or listed in your owner’s manual.
Replace the fuse with your ignition off, then test the defroster. If the new fuse blows immediately, you have a short circuit that needs professional attention.
Timer Relay Issues
Many vehicles use a timer relay that automatically shuts off the rear defroster after 10-15 minutes to prevent battery drain. When this relay fails, your defroster won’t turn on at all.
The timer relay is usually located in your engine compartment fuse box. Check your owner’s manual for the exact location. These relays typically cost $15-25 and plug in directly. Try swapping it with an identical relay from another system (like your horn relay) to test if this fixes the problem.
Fixing Broken Grid Lines
Broken grid lines are where you’ll save the most money doing repairs yourself. Dealerships often want to replace the entire rear window, while independent shops may charge $150-200 for what amounts to a $5 repair.
Conductive Paint Repair Kits
Conductive paint repair kits contain everything you need to fix broken grid lines. These kits include special electrically conductive paint, brushes, and detailed instructions. The paint essentially recreates the broken electrical connection.
Rear window defroster repair kits are available from several manufacturers and typically cost between $8-15. Popular brands include Permatex, SEM, and Dupli-Color, all of which work reliably for most grid line repairs.
The repair process is surprisingly simple. You clean the damaged area, apply the conductive paint over the break, and let it cure. Most repairs are permanent and work just as well as the original grid lines.
Step-by-Step Grid Line Repair
Clean the broken grid line area thoroughly with rubbing alcohol. Any dirt, ice scraper residue, or old adhesive will prevent the repair from bonding properly. Let the glass dry completely before proceeding.
Mask off the area around the break with thin tape. This keeps your repair neat and prevents the conductive paint from spreading to areas where it doesn’t belong. The paint is permanent once it cures, so precision matters.
Apply the conductive paint according to the kit instructions. Most require you to paint slightly beyond the visible break on both sides to ensure good electrical contact. Use steady, even strokes and avoid making the repair line thicker than the original grid.
Allow the repair to cure completely. Most conductive paints need 24-48 hours to reach full strength. Don’t test your defroster until the repair is fully cured, as premature testing can damage the new connection.
Testing Your Repair
After the repair has cured, test it carefully. Turn on your rear defroster and wait a few minutes for the grid to heat up. The repaired section should feel warm to the touch, just like the undamaged grid lines.
If your repair doesn’t heat up, you may have missed part of the break or the paint didn’t bond properly. Turn off the defroster, let everything cool down, and inspect your work closely. Sometimes breaks extend further than they initially appear.
You can also use a multimeter to test electrical continuity across your repair, but the heat test is usually sufficient for most DIY repairs.
When to Consider Professional Help
Some rear defroster problems are beyond simple DIY fixes. If you have multiple broken grid lines, extensive damage, or electrical issues beyond fuses and relays, professional repair might be worth considering.
Rear windows with delaminating or separating glass layers need replacement, not repair. If your grid lines are peeling off the glass or if the window itself is damaged, conductive paint won’t solve the underlying problem.
Complex electrical issues involving the defroster switch, wiring harnesses, or body control modules require diagnostic equipment and expertise that most DIYers don’t have access to.
Prevention and Maintenance
Most rear defroster damage is preventable with careful maintenance habits. Never use metal ice scrapers on your rear window. The grid lines are extremely delicate and even light scraping can cause permanent damage.
Remove stickers and decals carefully using heat and adhesive remover rather than scraping them off. When cleaning your rear window, use gentle pressure and avoid abrasive cleaners that might damage the grid lines.
Be cautious when loading cargo that might contact your rear window. Bikes, lumber, and other items can easily scratch grid lines if you’re not paying attention.
Cost Comparison: DIY vs Professional
The cost difference between DIY and professional rear defroster repair is dramatic. A conductive paint repair kit costs $5-15 and can fix multiple breaks. Fuses cost under $1 each, and timer relays run $15-25.
Professional repairs start around $150 for simple grid line fixes and can exceed $500 if window replacement is required. Even independent shops typically charge $75-100 per hour for electrical diagnosis, which can add up quickly for what might be a simple fuse problem.
The time investment for DIY repair is minimal. Most grid line repairs take 30 minutes of actual work, plus curing time. Electrical troubleshooting rarely takes more than an hour once you know what to check.
Frequently Asked Questions
How long do conductive paint repairs last?
Properly applied conductive paint repairs typically last as long as the original grid lines. The repair becomes a permanent part of the defroster system and won’t degrade under normal use. Some DIYers report repairs lasting 10+ years without issues.
Can I use regular paint or wire to fix broken grid lines?
Regular paint and wire won’t work for defroster repairs. The grid system requires specific electrical properties that only conductive paint can provide. Wire repairs look messy and often fail because they don’t bond properly to the glass surface.
Why does my defroster work intermittently?
Intermittent operation usually indicates a loose connection, failing timer relay, or marginal grid line break. Check your electrical connections first, then inspect grid lines for hairline cracks that might not be immediately obvious.
Will defroster repairs affect my vehicle’s resale value?
Professional-looking repairs using conductive paint don’t typically affect resale value. Clean, properly executed repairs are virtually invisible and restore full functionality. Avoid sloppy repairs that look obviously DIY, as these might concern potential buyers.
This article contains affiliate links. If you purchase through these links, we may earn a small commission at no extra cost to you.

Leave a Reply