Installing a dash cam with proper hidden wiring gives you professional-looking results while keeping your interior clean and uncluttered. You’ll avoid dangling cables, protect your wires from wear, and potentially enable parking mode monitoring that keeps recording even when your engine is off.
This complete guide covers everything from choosing the right mounting position to running cables invisibly through your car’s trim panels. We’ll walk through both front-only and dual-camera setups, plus show you how to hardwire for constant power.
Planning Your Dash Cam Installation
Before you start pulling trim panels, take time to plan your installation properly. The key to professional results is understanding your car’s interior layout and choosing the right routing path for your cables.
Walk around your vehicle and locate the A-pillar trim on the driver’s side. This plastic panel runs from your dashboard up to the roof and typically pops off with gentle pressure. Most cars have clips holding it in place rather than screws.
Check your headliner along the windshield edge. You’ll need to tuck wiring behind this fabric panel, and some vehicles have tighter spaces than others. Newer cars often have more room, while older models might require more patience.
Choosing the Best Mounting Position
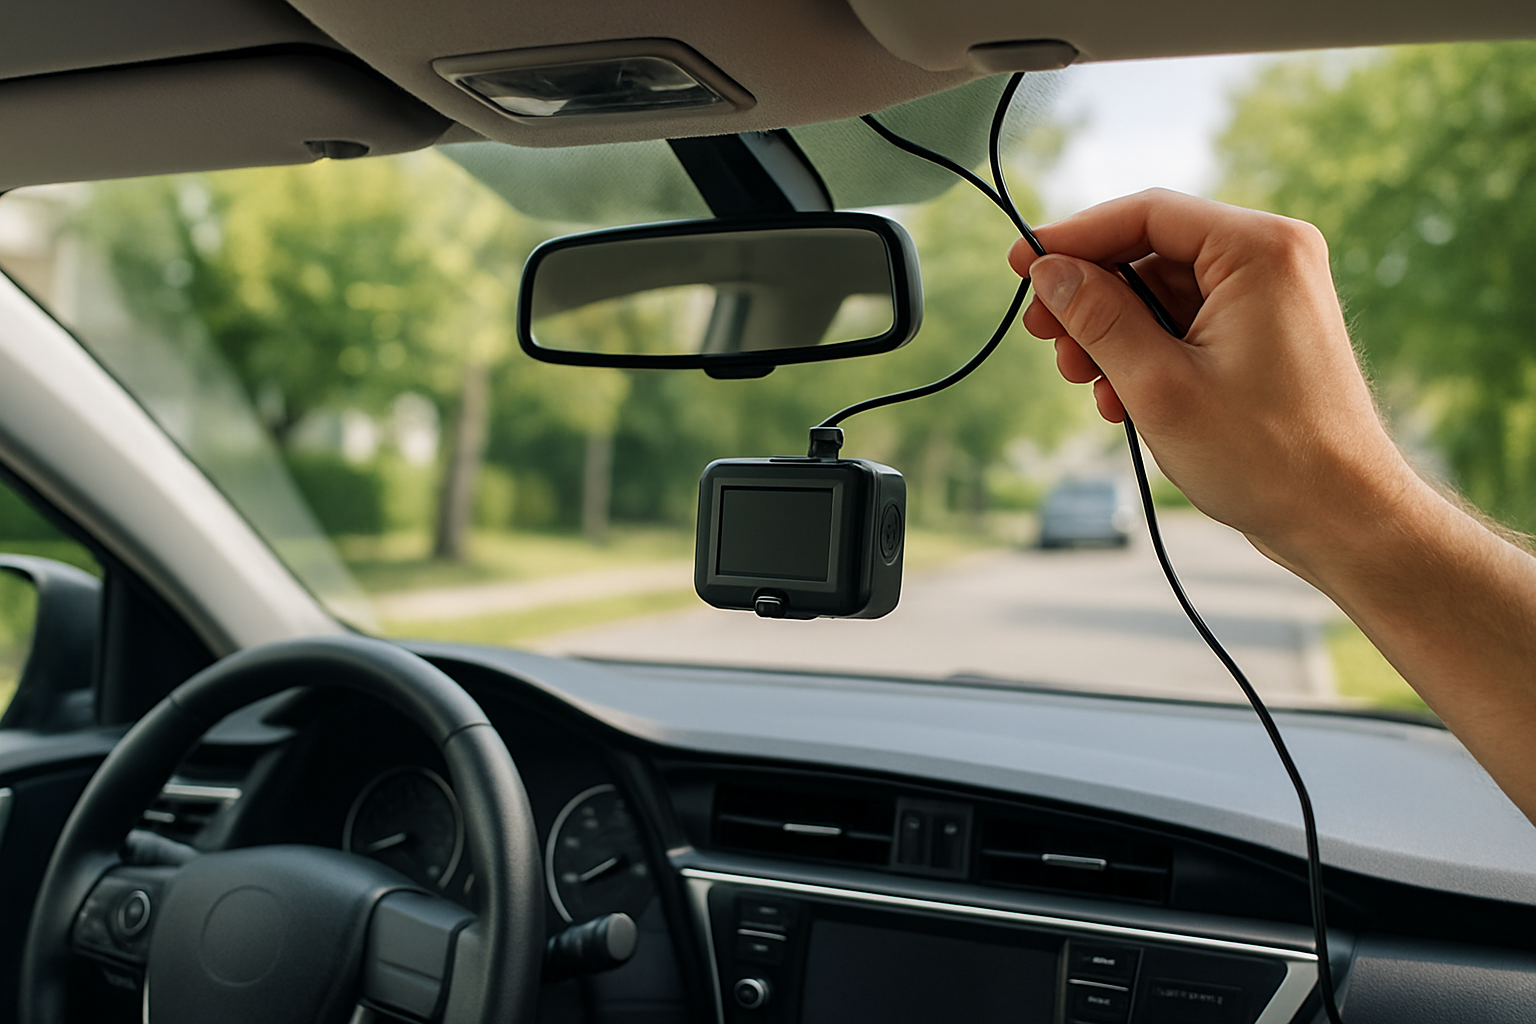
Your dash cam’s position affects both video quality and legal compliance. Mount it behind your rearview mirror where it won’t obstruct your view or interfere with airbag deployment zones.
The camera should sit in the area swept by your windshield wipers. This keeps the lens clean during rain and ensures you’ll always have a clear view. Avoid mounting too high where summer heat buildup can damage the electronics.
For dual-camera setups, your rear camera typically mounts in the center of your back window, about 6 inches from the top edge. This position captures the most road coverage while staying out of your reverse driving sightlines.
Test your chosen spots before committing. Use painter’s tape to temporarily position both cameras and check the viewing angles from your driver’s seat.
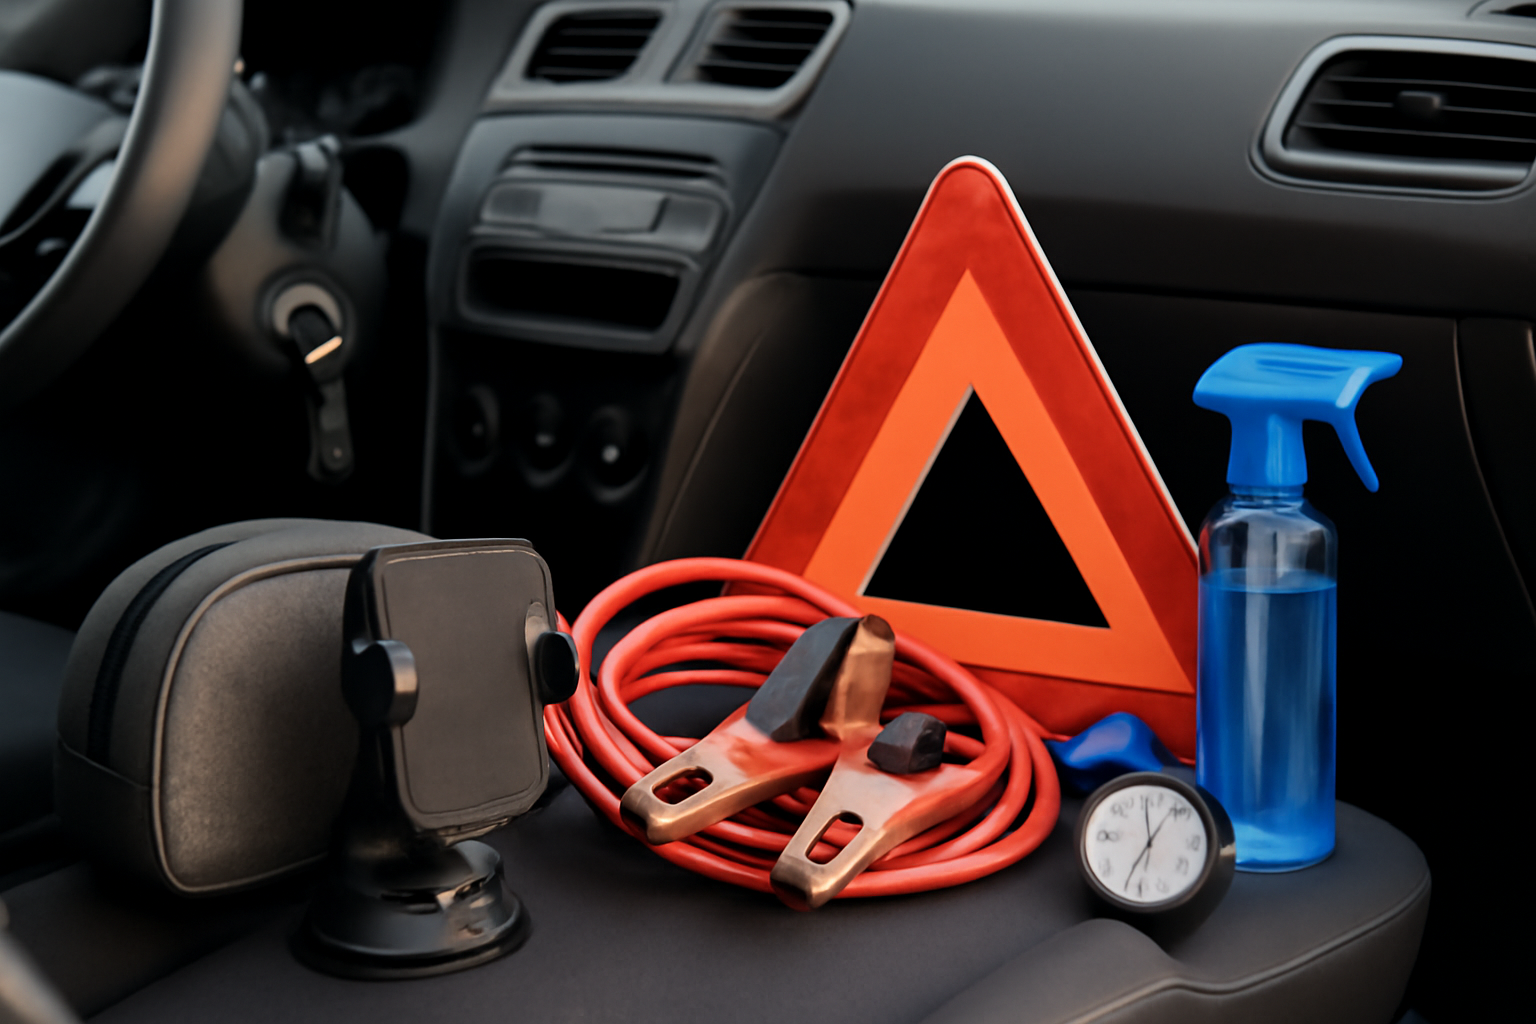
Tools and Parts You’ll Need
Gather your installation supplies before starting. You’ll need a hardwire kit designed for dash cams, which includes the necessary voltage regulation and fuse tapping connections.
Essential tools include plastic trim removal tools, wire strippers, electrical tape, and zip ties. A voltage tester helps verify you’re connecting to the right fuse circuits. Some installers prefer a fuse tap puller for easier fuse box work.
You’ll also want cable management clips to secure loose wiring and prevent rattles. Pick up extra zip ties in case you need to anchor cables at multiple points along your routing path.
Understanding Hardwire Kits and Fuse Taps
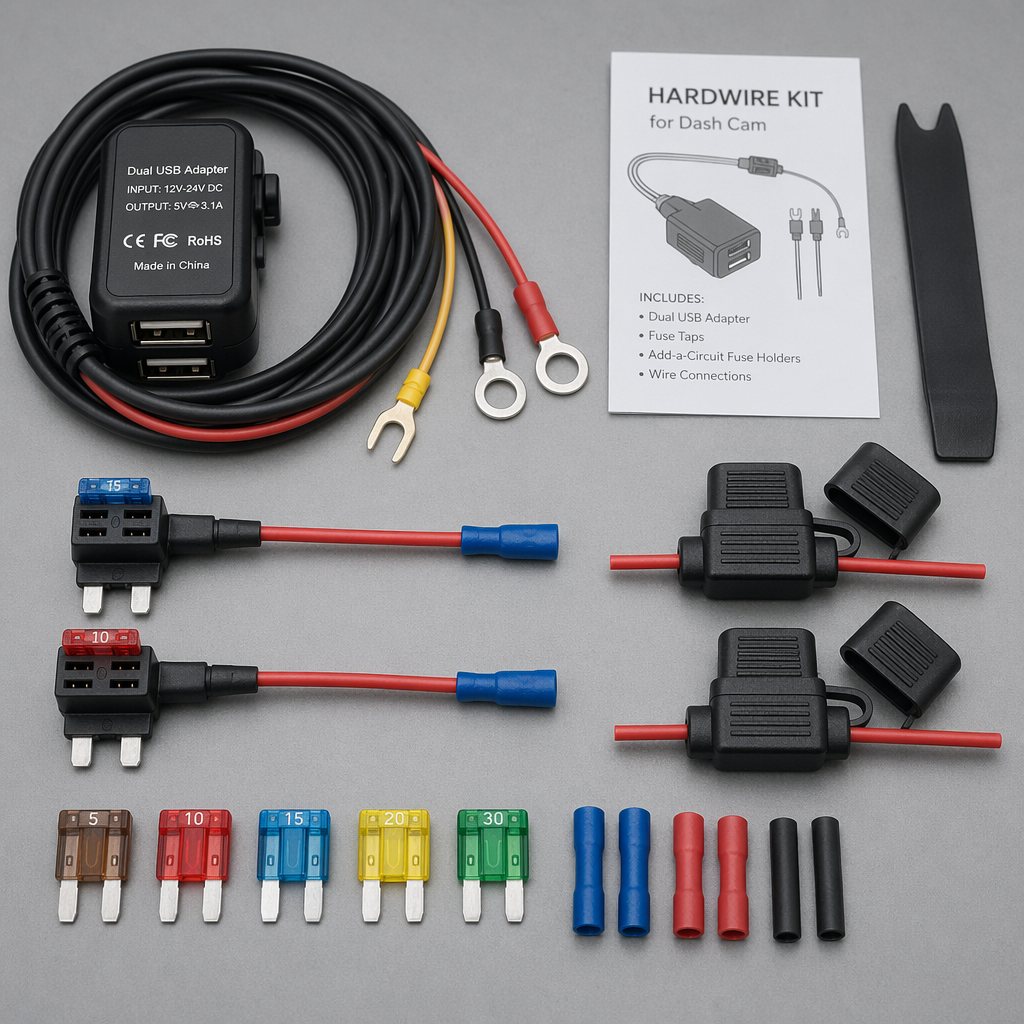
A proper hardwire kit converts your car’s 12V electrical system down to the 5V most dash cams require. These kits include built-in fuses and voltage regulation to protect both your camera and vehicle electrical system.
The kit connects to your fuse box using fuse taps, which are small adapters that slide into existing fuse slots. You’ll need two circuits: one that’s always powered for parking mode, and one that only has power when your ignition is on.
Look for hardwire kits with parking mode voltage monitoring. These automatically shut off power when your battery voltage drops too low, preventing dead battery situations during extended parking surveillance.
Locating Your Vehicle’s Fuse Box
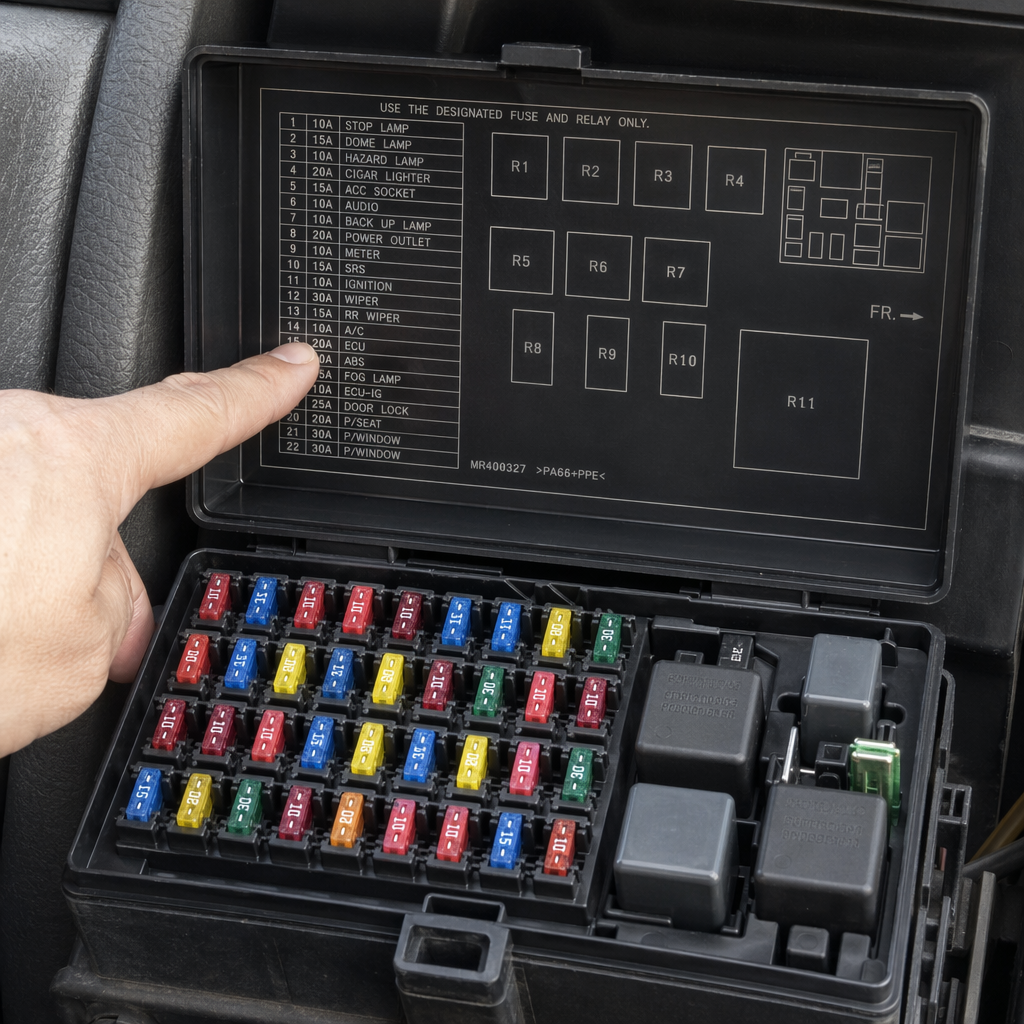
Most vehicles have their main fuse box either under the hood or inside the cabin near the driver’s left knee. Check your owner’s manual for the exact location and fuse diagram.
You need to identify two specific fuse types. Find a fuse that’s always powered (like interior lights or clock memory) for your parking mode connection. For your switched power, locate a fuse that only has voltage when your ignition is in the “on” position.
Use your voltage tester to confirm each fuse’s behavior before connecting anything. Some fuses that seem logical don’t actually behave as expected, so testing prevents installation problems later.
Running Cables Behind the Headliner
Start at your dash cam mounting position and work toward the A-pillar. Gently pull down the headliner edge near the windshield to create a small gap. Most headliners have enough flexibility to tuck thin cables without removing the entire panel.
Use a plastic trim tool to push your power cable into the gap between the headliner and roof structure. Work slowly and avoid using metal tools that could tear the fabric. The cable should disappear completely when you release the headliner.
For dual-camera installations, run your rear camera cable along the headliner from front to back. Route it along the passenger side to avoid the driver’s airbag deployment zone. This cable will be much longer and requires more patience to hide properly.
Removing and Working with A-Pillar Trim
The A-pillar trim typically removes by pulling firmly at the bottom and working upward. These panels use spring clips that require steady pressure rather than gentle tugging. Don’t be afraid to use reasonable force.
Once removed, you’ll see the space behind the trim where your cables will route down toward the dashboard. Some vehicles have existing wire harnesses you can follow as a guide for the best path.
Secure your dash cam cables to existing wiring with zip ties every 12 inches. This prevents rattles and keeps everything organized if you need to remove the trim again later.
Front Camera Installation Steps
Clean your windshield thoroughly where the camera will mount. Any dust or residue will prevent proper adhesion and could cause your camera to fall off while driving.
Mount your camera first, then route the power cable. Connect the cable to your camera and immediately start tucking it behind the headliner before the adhesive fully sets. This prevents having to move a firmly mounted camera later.
Run the cable down through the A-pillar area and behind your dashboard toward the fuse box. Leave some extra length at both ends for connections and future adjustments.
Dual-Camera Setup Considerations
Rear camera installation requires running a much longer cable from your front camera or power source. Most dual-camera kits include a 20-foot cable specifically for this purpose.
Route this cable along the headliner edge, down the rear pillar trim, and across to your rear window mounting position. You’ll need to remove multiple trim pieces, so work methodically and keep track of which clips go where.
The rear camera typically connects to your front camera rather than directly to your hardwire kit. Check your specific dash cam manual for the correct wiring configuration, as some systems require different connection methods.
Making the Hardwire Connections
Connect your fuse taps to the appropriate fuses you identified earlier. The tap should slide completely into the fuse slot with the original fuse secure in the tap’s holder. A loose connection here can cause power issues or blown fuses.
Connect your hardwire kit’s red wire to the switched power fuse tap and the yellow wire to the always-on power tap. The black wire connects to a good ground point, such as a bolt in the metal dashboard structure.
Double-check all connections before plugging in your dash cam. Use your voltage tester to verify the hardwire kit is outputting the correct voltage and that parking mode switching works properly.
Configuring Parking Mode
Parking mode allows your dash cam to continue recording when parked, typically triggered by motion or impact detection. This feature requires the always-on power connection from your hardwire kit.
Access your camera’s settings menu to enable parking mode and adjust sensitivity levels. Set the voltage cutoff threshold based on your battery type and age. Most installers use 12.2V for newer batteries and 12.4V for older ones.
Test parking mode by turning off your engine and walking around your vehicle. The camera should detect motion and begin recording, then return to standby mode after the programmed time period.
Cable Management and Finishing Touches
Secure all loose cables with zip ties or adhesive clips. Pay special attention to areas where cables could rub against metal edges or moving parts. A small amount of electrical tape can provide extra protection at potential wear points.
Reinstall all trim pieces in reverse order, making sure no cables are pinched or visible. The A-pillar trim should snap back into place firmly, and the headliner should lay flat without bulges from hidden wires.
Route any excess cable length neatly behind your dashboard. Avoid areas near your pedals or steering column where loose wires could interfere with vehicle operation.
Testing Your Installation
Start your engine and verify your dash cam powers on automatically. Check that it begins recording immediately and that video quality meets your expectations from both front and rear cameras.
Test all camera functions including audio recording, night vision, and any smartphone app connectivity. Take a short test drive to ensure nothing rattles or comes loose with normal vehicle movement.
Verify parking mode operation by turning off your engine and triggering motion detection. The camera should activate, record the programmed duration, then return to standby without draining your battery excessively.
Recommended Hardwire Kits and Accessories
Quality hardwire kits make the difference between a professional installation and ongoing electrical problems. Look for hardwire kits with built-in voltage monitoring and automatic shutoff features to protect your vehicle’s battery.
Popular options include the Viofo HK3 hardwire kit for most dash cameras, and brand-specific kits from manufacturers like BlackVue, Thinkware, and Garmin. These kits include the proper fuse taps and detailed installation instructions for your specific camera model.
Consider investing in a professional trim removal kit if you plan to do more automotive electrical work. Quality plastic tools prevent trim damage and make future installations much easier.
Troubleshooting Common Installation Issues
If your dash cam doesn’t power on after hardwiring, check fuse connections first. Loose fuse taps are the most common cause of power problems and can usually be fixed by reseating the connections firmly.
Camera overheating issues often result from mounting too close to your windshield’s top edge where summer heat concentrates. Move the camera lower or consider a heat-resistant mounting pad for extreme climates.
Parking mode battery drain problems typically indicate incorrect voltage cutoff settings or a failing vehicle battery. Lower the cutoff threshold or have your battery tested if you experience frequent dead battery situations.
Frequently Asked Questions
Can I install a hardwired dash cam without affecting my warranty?
Most vehicle warranties won’t be affected by dash cam installation if you use proper fuse taps and don’t modify existing wiring. However, any damage caused by improper installation won’t be covered, so consider professional installation for expensive vehicles under warranty.
How long can parking mode run without draining my battery?
This depends on your battery’s age and capacity, plus your camera’s power consumption. Most modern dash cams with proper voltage monitoring can run 8-12 hours in parking mode without risking a no-start condition. Older batteries may require shorter parking mode durations.
Do I need different installation approaches for different vehicle types?
Luxury vehicles often have more complex trim removal procedures and may require special tools. Trucks and SUVs typically have more interior space for cable routing, while compact cars might need more creative cable management solutions. The basic principles remain the same across vehicle types.
What should I do if my rear camera cable isn’t long enough?
Most dual-camera systems include cables long enough for standard passenger vehicles. For large SUVs or trucks, you may need extension cables specifically designed for your camera model. Avoid splicing standard cables, as this can cause video quality issues or power problems.
This article contains affiliate links. If you purchase through these links, we may earn a small commission at no extra cost to you.
Leave a Reply