Maintaining your vehicle’s braking system is one of the most important safety tasks you can perform at home. Bleeding your brakes removes air bubbles from the brake lines, ensuring your pedal feels firm and responsive when you need it most.
While many drivers think brake bleeding requires expensive shop equipment, you can actually do this job in your driveway with basic tools and a willing helper. The process takes about an hour and costs a fraction of what you’d pay at a service center.
Understanding When Your Brakes Need Bleeding
Your brake system relies on hydraulic fluid to transfer the force from your pedal to the brake calipers at each wheel. When air enters the system, it compresses under pressure unlike brake fluid, which doesn’t compress. This creates that spongy, mushy pedal feel that reduces your stopping power.
You’ll know it’s time to bleed your brakes when the pedal feels soft or travels closer to the floor than usual before engaging. This commonly happens after brake repairs, when changing brake fluid, or if moisture has contaminated your brake system over time.
Most mechanics recommend bleeding your brakes every two years during regular brake fluid changes. Fresh fluid not only removes air bubbles but also eliminates moisture that can cause internal corrosion in your brake components.
DOT 3 vs DOT 4 Brake Fluid: What You Need to Know
Before you start, you need to use the correct brake fluid type for your vehicle. Check your owner’s manual or the brake fluid reservoir cap, which usually specifies DOT 3 or DOT 4.
DOT 3 fluid works for most older vehicles and has a lower boiling point, making it suitable for normal driving conditions. DOT 4 fluid handles higher temperatures and is required in many newer cars, especially those with ABS or stability control systems.
You can use DOT 4 in a system designed for DOT 3, but never mix DOT 3 into a DOT 4 system. Both fluids absorb moisture from the air, so keep your fluid containers sealed and use fresh fluid for best results.
Tools and Materials You’ll Need
Gather these items before you begin:
- One quart of the correct DOT brake fluid
- Box-end wrenches or brake line wrenches (usually 8mm, 10mm, or 11mm)
- Clear plastic tubing that fits snugly over the bleeder screws
- Clean glass jar or clear plastic bottle
- Jack and jack stands or car ramps
- Shop rags or paper towels
- Safety glasses
Professional brake line wrenches work better than regular box-end wrenches because they grip the bleeder screw more securely and reduce the risk of rounding off the corners. You can find these at any auto parts store.
The Correct Bleeding Order
Always bleed your brakes in the proper sequence to ensure complete air removal. Start with the brake caliper farthest from the master cylinder and work your way closer. This prevents air from being pushed further into the system.
For most vehicles, the correct order is:
- Right rear brake
- Left rear brake
- Right front brake
- Left front brake
Some vehicles with diagonal brake systems use a different sequence, so check your service manual if you’re unsure. The key principle remains the same: start farthest from the master cylinder and work your way toward it.
Step-by-Step Brake Bleeding Process
Preparation
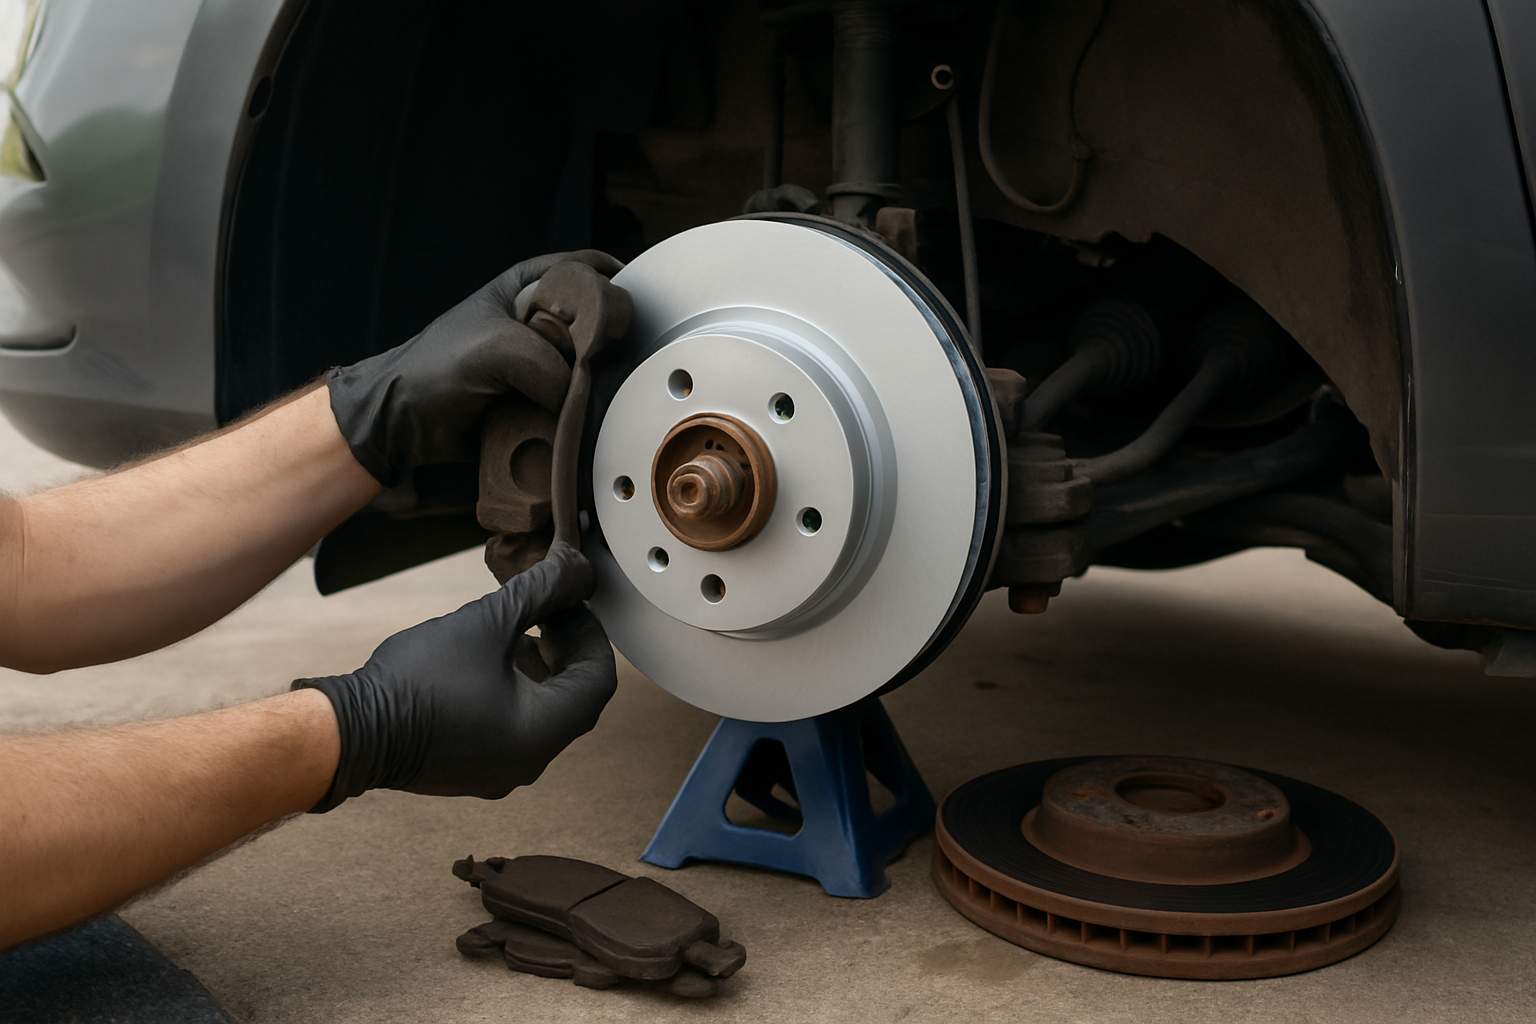
Park on level ground and engage the parking brake. Remove all four wheels and locate the bleeder screws on each brake caliper or wheel cylinder. These small screws typically have 8mm or 10mm hex heads.
Clean around each bleeder screw with brake cleaner or denatured alcohol to prevent dirt from entering the system. Open the brake fluid reservoir under the hood and top it off with fresh fluid.
Starting the Bleeding Process
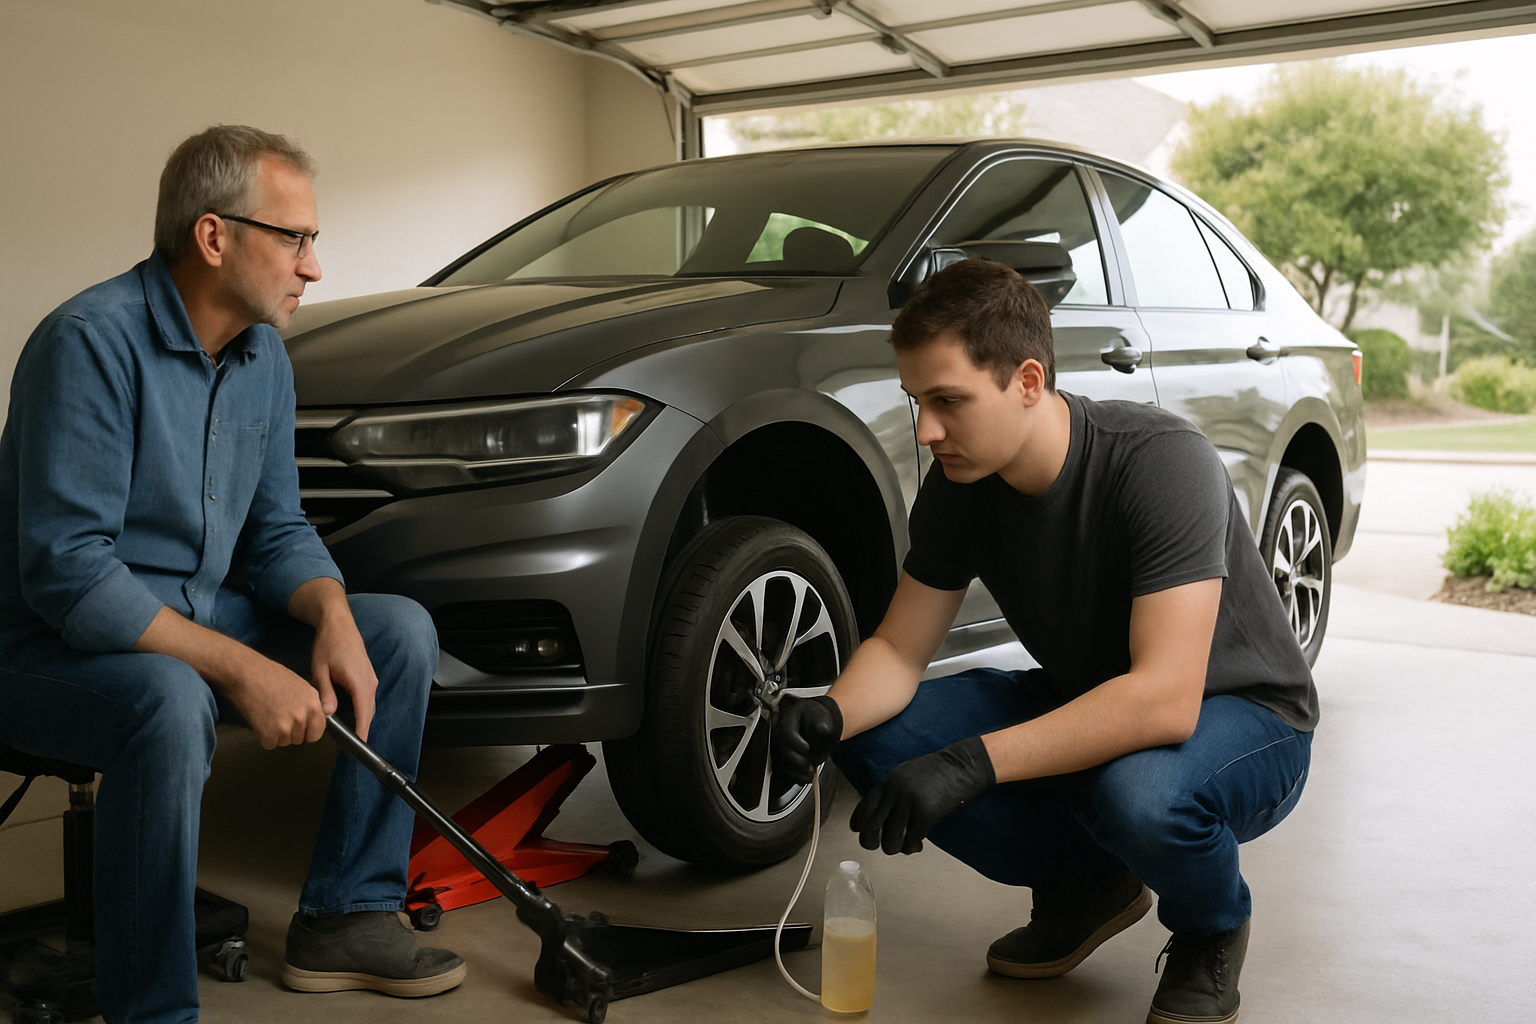
Begin with the right rear brake. Attach your clear tubing to the bleeder screw and run the other end into your collection jar. Add enough brake fluid to the jar so the tube end stays submerged, preventing air from being sucked back into the system.
Position your helper in the driver’s seat while you work under the vehicle. Communication is crucial for this process to work correctly.
The Bleeding Sequence
Have your helper press the brake pedal slowly and hold it down firmly. Call out “pedal down” when they should press, and “hold it” when the pedal reaches the floor.
With the pedal held down, use your wrench to open the bleeder screw about half a turn. You’ll see brake fluid and possibly air bubbles flow through the tubing into your jar.
Close the bleeder screw snugly, then tell your helper to release the pedal. Wait a moment, then repeat this process. You should see fewer air bubbles with each cycle.
Continue until you see only clear, bubble-free fluid coming from the tubing. This usually takes 5-10 pump cycles per wheel, depending on how much air was in the system.
Moving to Each Wheel
After completing the right rear, move to the left rear, then right front, and finally left front. Check the master cylinder reservoir frequently and keep it topped off with fresh fluid throughout the process.
Never let the reservoir run dry, or you’ll introduce more air into the system and have to start over. Keep several bottles of brake fluid handy, as you’ll use more than you might expect.
Testing Your Work
After bleeding all four wheels, pump the brake pedal several times with the engine off. The pedal should feel firm and consistent, returning to the same height each time you press it.
Start the engine and test the pedal feel again. On vehicles with power brakes, the pedal will sink slightly when the engine starts, which is normal. The pedal should still feel solid and not sink slowly to the floor.
Take a careful test drive at low speeds in a safe area before returning to normal driving. Your brakes should feel responsive and confident.
One-Person Bleeding Alternatives
If you don’t have a helper available, several tools can make brake bleeding a one-person job. One-way check valves attach to your bleeder screws and prevent air from being sucked back into the system when you release the brake pedal.
These one-person brake bleeder kits include everything you need and work well for routine maintenance bleeding. Vacuum brake bleeders are another option, though they require more expensive equipment.
Pressure bleeders connect to your brake fluid reservoir and use compressed air to push fluid through the system. Professional shops often use these because they’re faster and don’t require an assistant.
Common Mistakes to Avoid
Don’t over-tighten bleeder screws when closing them. These screws thread into aluminum or soft metal and can easily strip if you apply too much torque. Snug is tight enough.
Always press the brake pedal slowly and deliberately. Quick, jerky movements can create turbulence that makes it harder for air bubbles to separate from the fluid.
Replace your brake fluid reservoir cap between bleeding sessions if you’re taking breaks. Brake fluid absorbs moisture from the air rapidly, and even a few hours of exposure can contaminate fresh fluid.
When to Seek Professional Help
Some situations require professional equipment and expertise. If your brake pedal still feels spongy after proper bleeding, you might have internal master cylinder problems or air trapped in the ABS system.
Vehicles with complex ABS systems sometimes need special scan tools to cycle the ABS pump during bleeding. Many European cars and some domestic models require this additional step to remove all air from the system.
If you discover brake fluid leaks, damaged brake lines, or worn brake components during the bleeding process, have these issues addressed by a qualified mechanic before driving the vehicle.
Frequently Asked Questions
How often should I bleed my brakes?
Most manufacturers recommend bleeding brakes every two years or when changing brake fluid. However, you should bleed them immediately after any brake system repairs or if you notice a spongy pedal feel.
Can I reuse brake fluid that comes out during bleeding?
Never reuse brake fluid that’s been bled from your system. This fluid may contain air, moisture, and contaminants that can damage your brake components. Always dispose of used brake fluid properly at an auto parts store or service center.
What if I accidentally let the master cylinder run dry?
If the reservoir empties during bleeding, you’ll need to start the entire process over. Air will enter the master cylinder and potentially the ABS system, requiring more extensive bleeding procedures.
Why does my pedal still feel soft after bleeding?
A persistently soft pedal after proper bleeding can indicate internal master cylinder wear, air trapped in the ABS system, or brake fluid leaks. Have your system inspected by a professional if bleeding doesn’t restore proper pedal feel.
This article contains affiliate links. If you purchase through these links, we may earn a small commission at no extra cost to you.
Leave a Reply